The battles around Rzhev are easily among the toughest and bloodiest of the entire World War II. They are also not very well known in the west, especially given how the Red Army suffered a quarter of a million dead there in early 1942 alone.
When designing this scenario for Moscow 41, we really wanted to do these momentous events justice. The mechanics and the scenario design were carefully adapted to the period. As a result, the “Rzhev meat grinder” plays very differently from anything you’ve seen in Unity of Command II before.
Our intention is that playing as the Soviets feels authentic with respect to history. The adjustments to play style that this requires can be difficult, but we feel it’s well worth it because it gives an entirely new perspective on this period of the war.
With that in mind, we’ll be taking an in-depth look at a smaller section of the Rzhev Offensive around the Volga crossing. This should highlight some of the new tactical skills and ideas that you’ll be needing when playing as a Soviet commander.
Situation
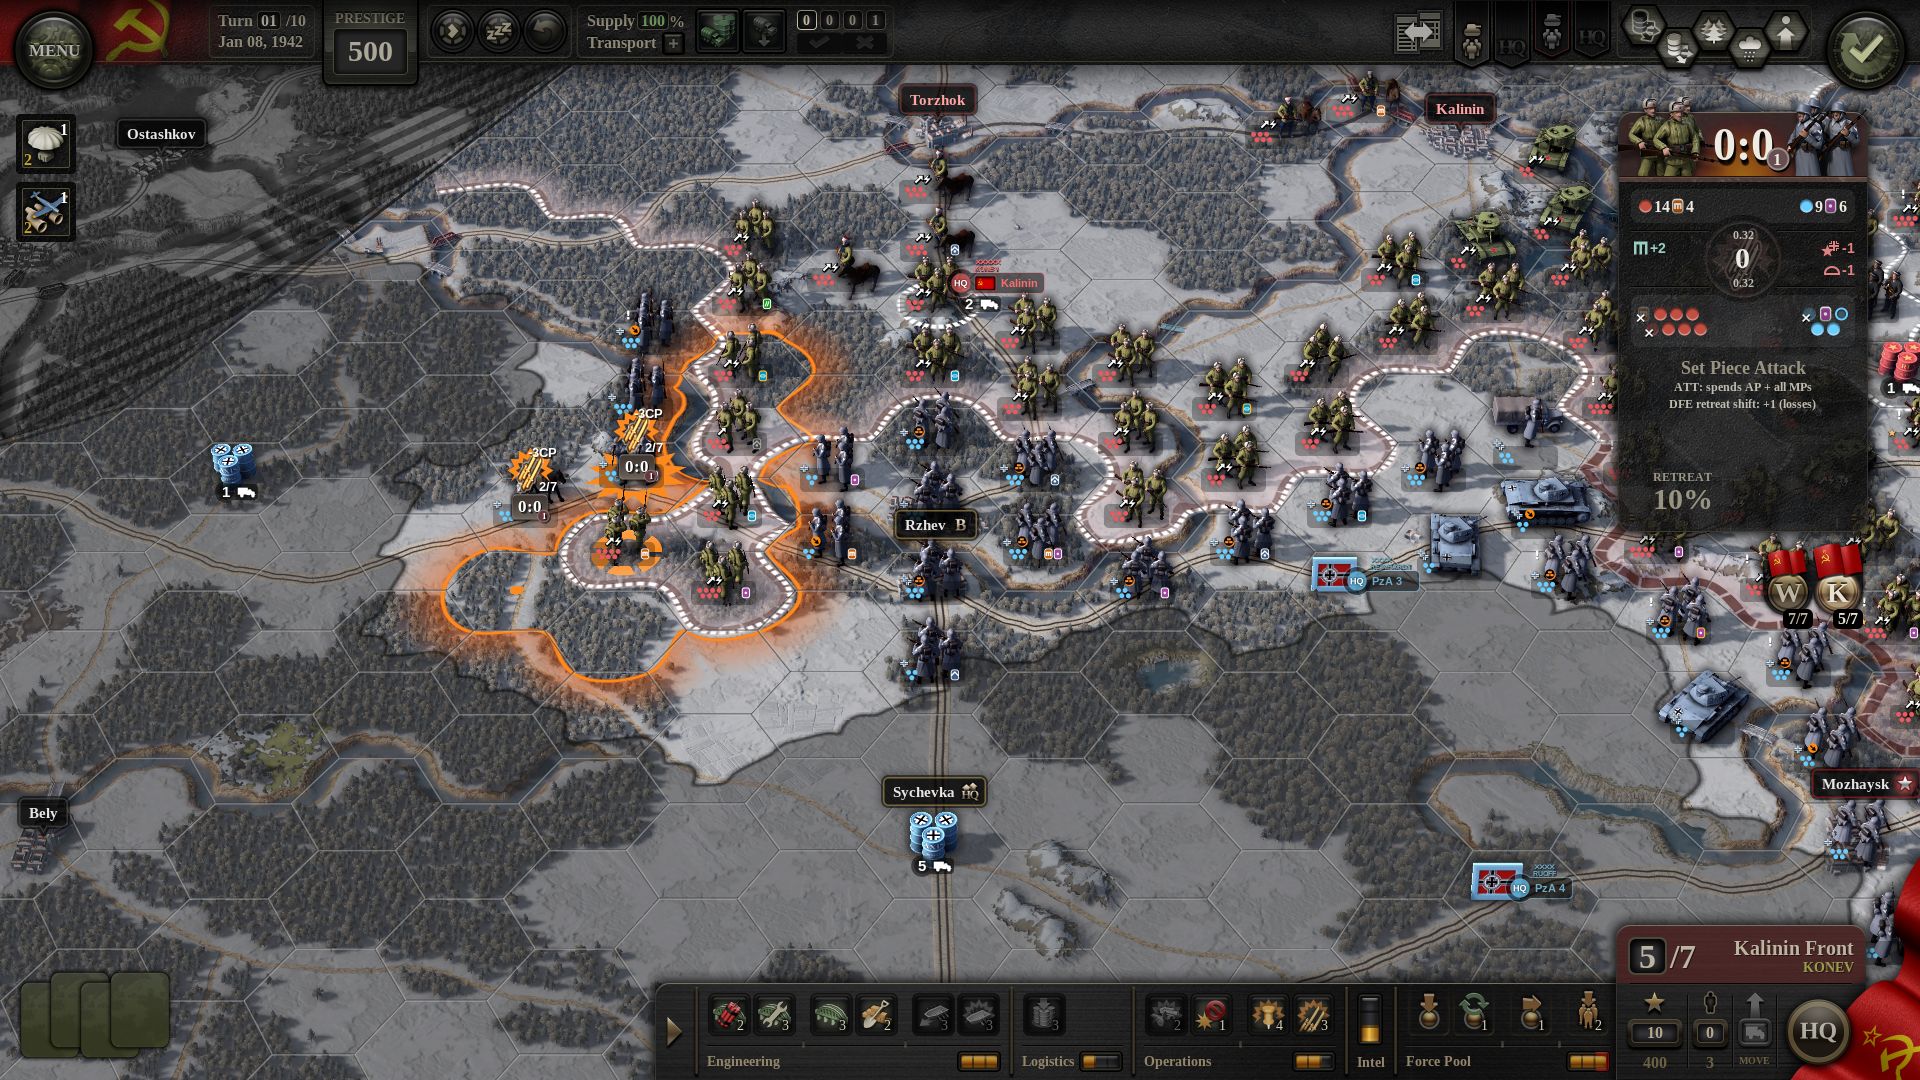
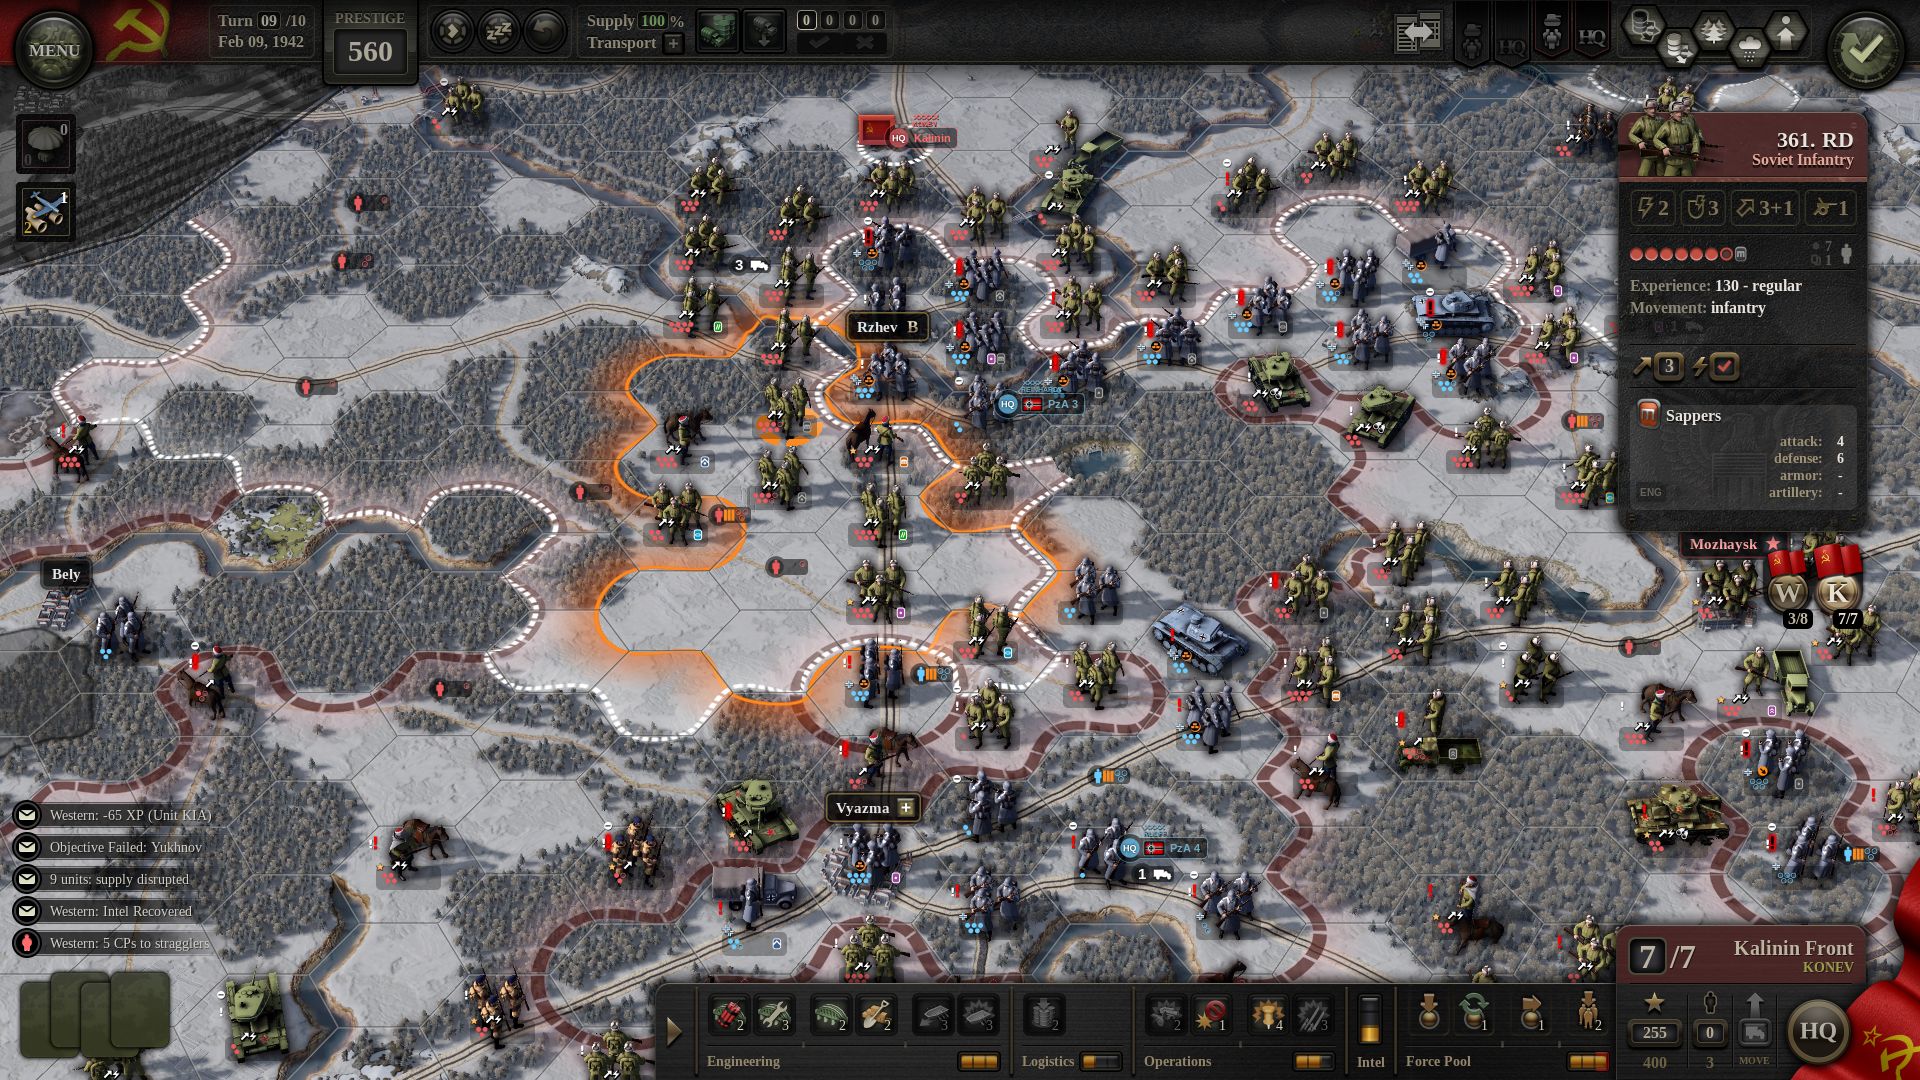
The plan for our forces in this section of the map is to cut through and capture Rzhev city proper. In doing that, we will demonstrate how to properly develop operations in the Soviet way.
The first thing we notice is that the German unit defending Rzhev is elite. It would be advisable to attack it with at least a veteran unit, in order to bridge the experience gap. There are no veteran units assigned to the Kalinin Front, however. The German unit also has the advantage of being fortified. Before launching our main assault, we will need to breach its fortifications.
Given our relatively weaker units, we should think in terms of power projection in order to achieve our objective. We want enough of our troops within striking range of Rzhev for the main assault to be decisive. There is real potential for high casualties, and a piecemeal effort would only dull our overall combat capabilities.
Positioning
The tactical situation is rather unfavorable. We are holding a single pontoon bridge across the Volga and, beyond that, only a very narrow corridor surrounded by the enemy from both sides. Besides pouring troops through this gap, we will need to keep them in supply as well.
To get the most out of the Kalinin HQ abilities, specialists should be rearranged during battle preparation and front line troops should receive replacements by reorganizing rear units. Note that city terrain does not favor armor specialists and plan your dispositions accordingly.
The first task at hand is to widen the corridor for security reasons. Our troops should constantly be poured through the gap since this is the only center of gravity for the Kalinin Front. The entire width of the front should move as one big column, employing all troops that can be spared from defensive duty.
The Soviets
Soviet units are unique in that they’re able to mount Set Piece Attacks with a Sapper specialist only – they do not require artillery. This, combined with Suppressive Fire and then a direct assault, will be our main method for breaching enemy fortifications outside city terrain.
Another good use for a Set Piece Attack is to force an enemy unit to retreat without taking undue losses yourself. In the absence of artillery this is best combined with Feint Attack beforehand. A Feint Attack will both weaken the enemy and increase its chance of retreating.
When playing the Soviets, it is crucial to weaken the enemy with preliminary attacks before landing the main blow, as the odds are often stacked against you. Sometimes this means taking higher casualties than the enemy does, so always make sure that you have enough troops for follow up attacks.
While entrenchment can be lifted with Suppressive Fire and the Artillery Preparation card can concentrate that fire in a narrow area, using artillery always brings the risk of turning the city into ruins. If that happens such an attack is highly counterproductive. Artillery is best used for breaching defensive lines outside of settlements while Sappers are best used for assaulting cities.
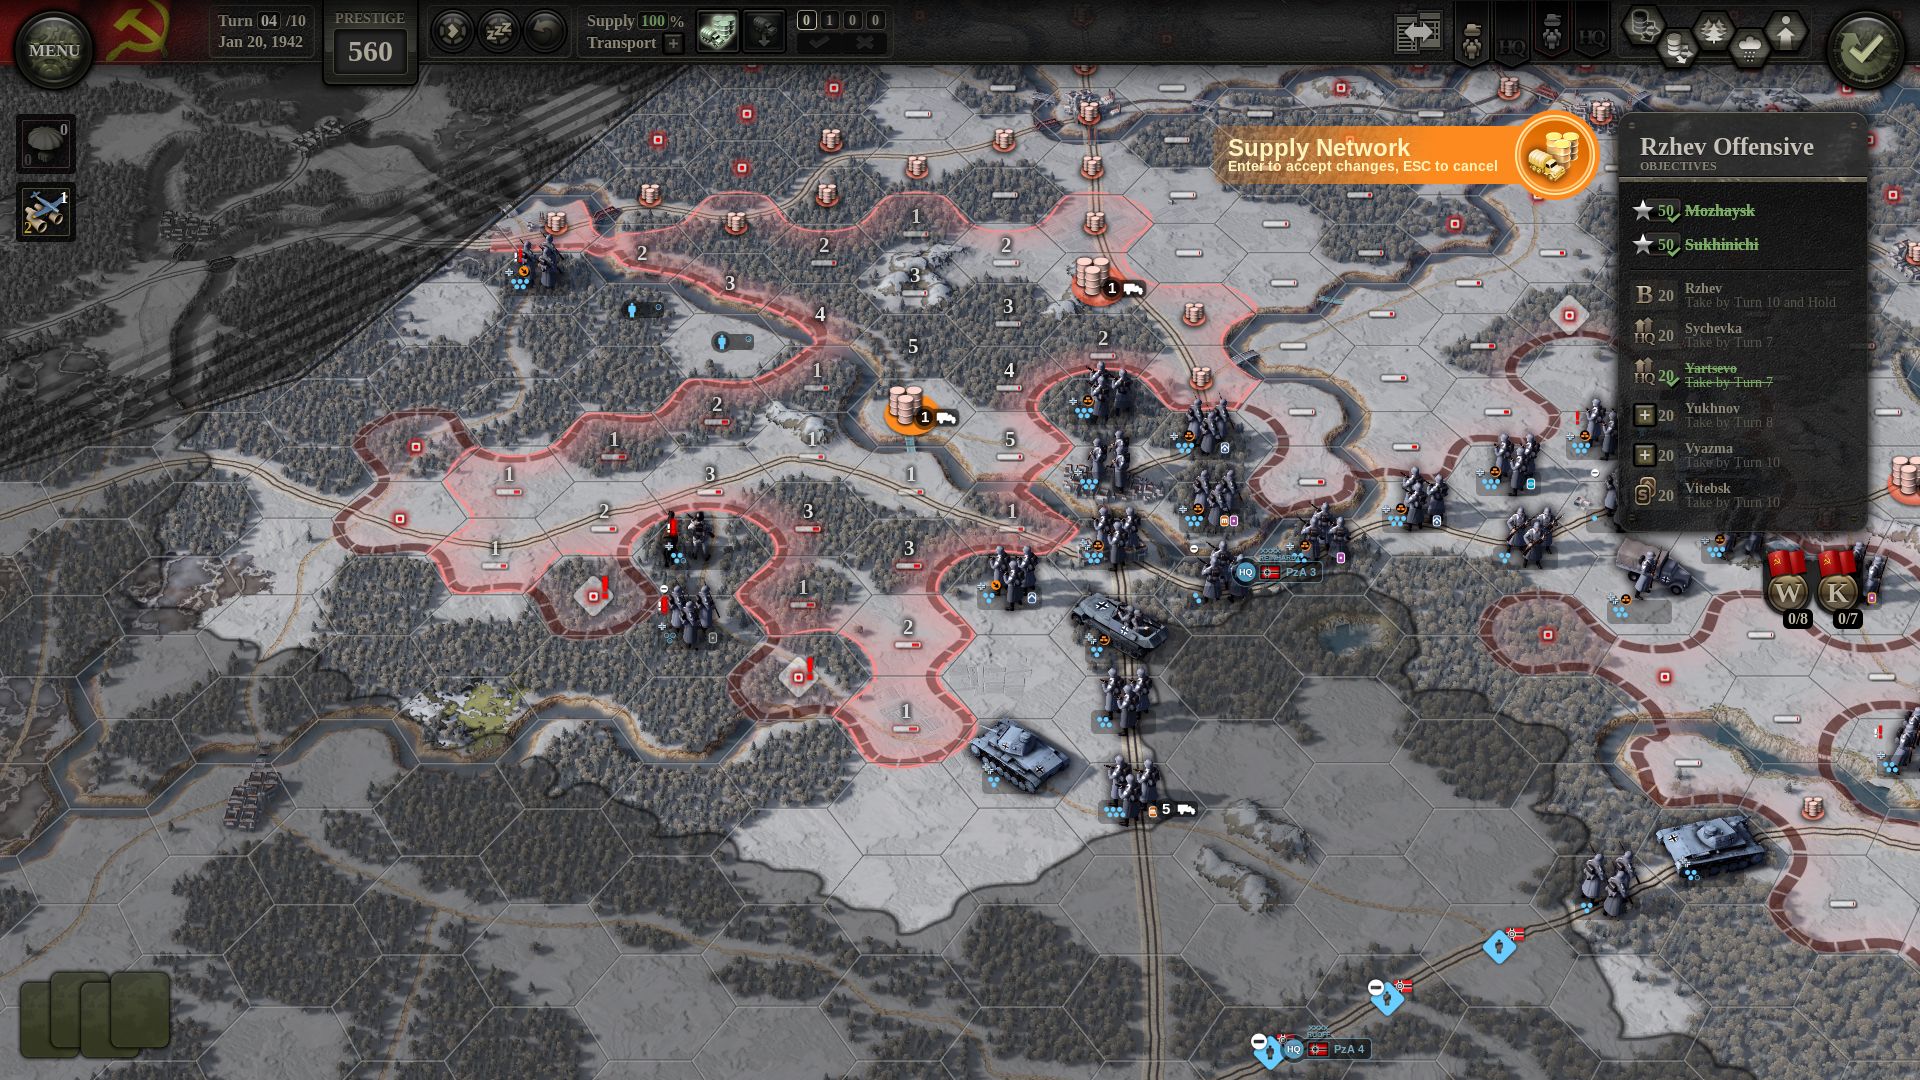
Supply
We want to create a supply hub as close as possible to the gap in the enemy lines. The hex next to our pontoon bridge is the best location but, to place a hub there, we need to clear the forest road running north the Volga.
Killing the lone German unit blocking this road connects the new hub to the supplied rail line in the north west. If we’re in need of trucks, the nearby hub can be reduced, and its truck re-deployed at the pontoon bridge hub.
With the corridor secured, and the gap widened, we are able to resolve our supply issues and assemble a bigger force on the other side of the river. The stage is now set for an approach to our target.
Sappers
The chance to breach entrenchment/fortifications with a Set Piece Attack will depend on the combat odds. To increase the odds, Sappers are best used on stronger units like Guards, Cavalry or regular infantry with veteran status.
If a Set Piece Attack is only partially successful, your attacking unit will be left with many of its steps suppressed. On top of that, the enemy HQ may be able to re-entrench the defending unit during its own turn. It’s not guaranteed that your unit will be able to attack again on the following turn.
For this reason, Sappers are best used in pairs. This heavily increases the chance of success simply by planning to use power projection in advance.

Ski Troops
Recon in Force is not a new HQ action but, starting with Moscow 41 DLC, we’ve added “binoculars” icons to the units capable of using it in the current turn. As a reminder, these are armored units, or other units with an active recon specialist (provided that their HQ has this ability).
Soviet ski specialists, besides granting an attack bonus in snow terrain, also enable Recon in Force. This works great for removing enemy Zone of Control, so that a target hex can be attacked multiple times by rotating your units in the attack.
Less well known is the tactic of clearing enemy supply hub, HQ or stragglers with Recon in Force. A ski specialist, similar to a recon specialist, can be used to clear these enemy structures, provided the fighting takes place in the snow.
Unlike a recon specialist though, the ski specialist is not suppressed after recon in force. You can use it to clear the way (with Recon in Force), and then provide its attack bonus later in the same turn. Provided you employ them properly, ski specialists can be devastating to the enemy.
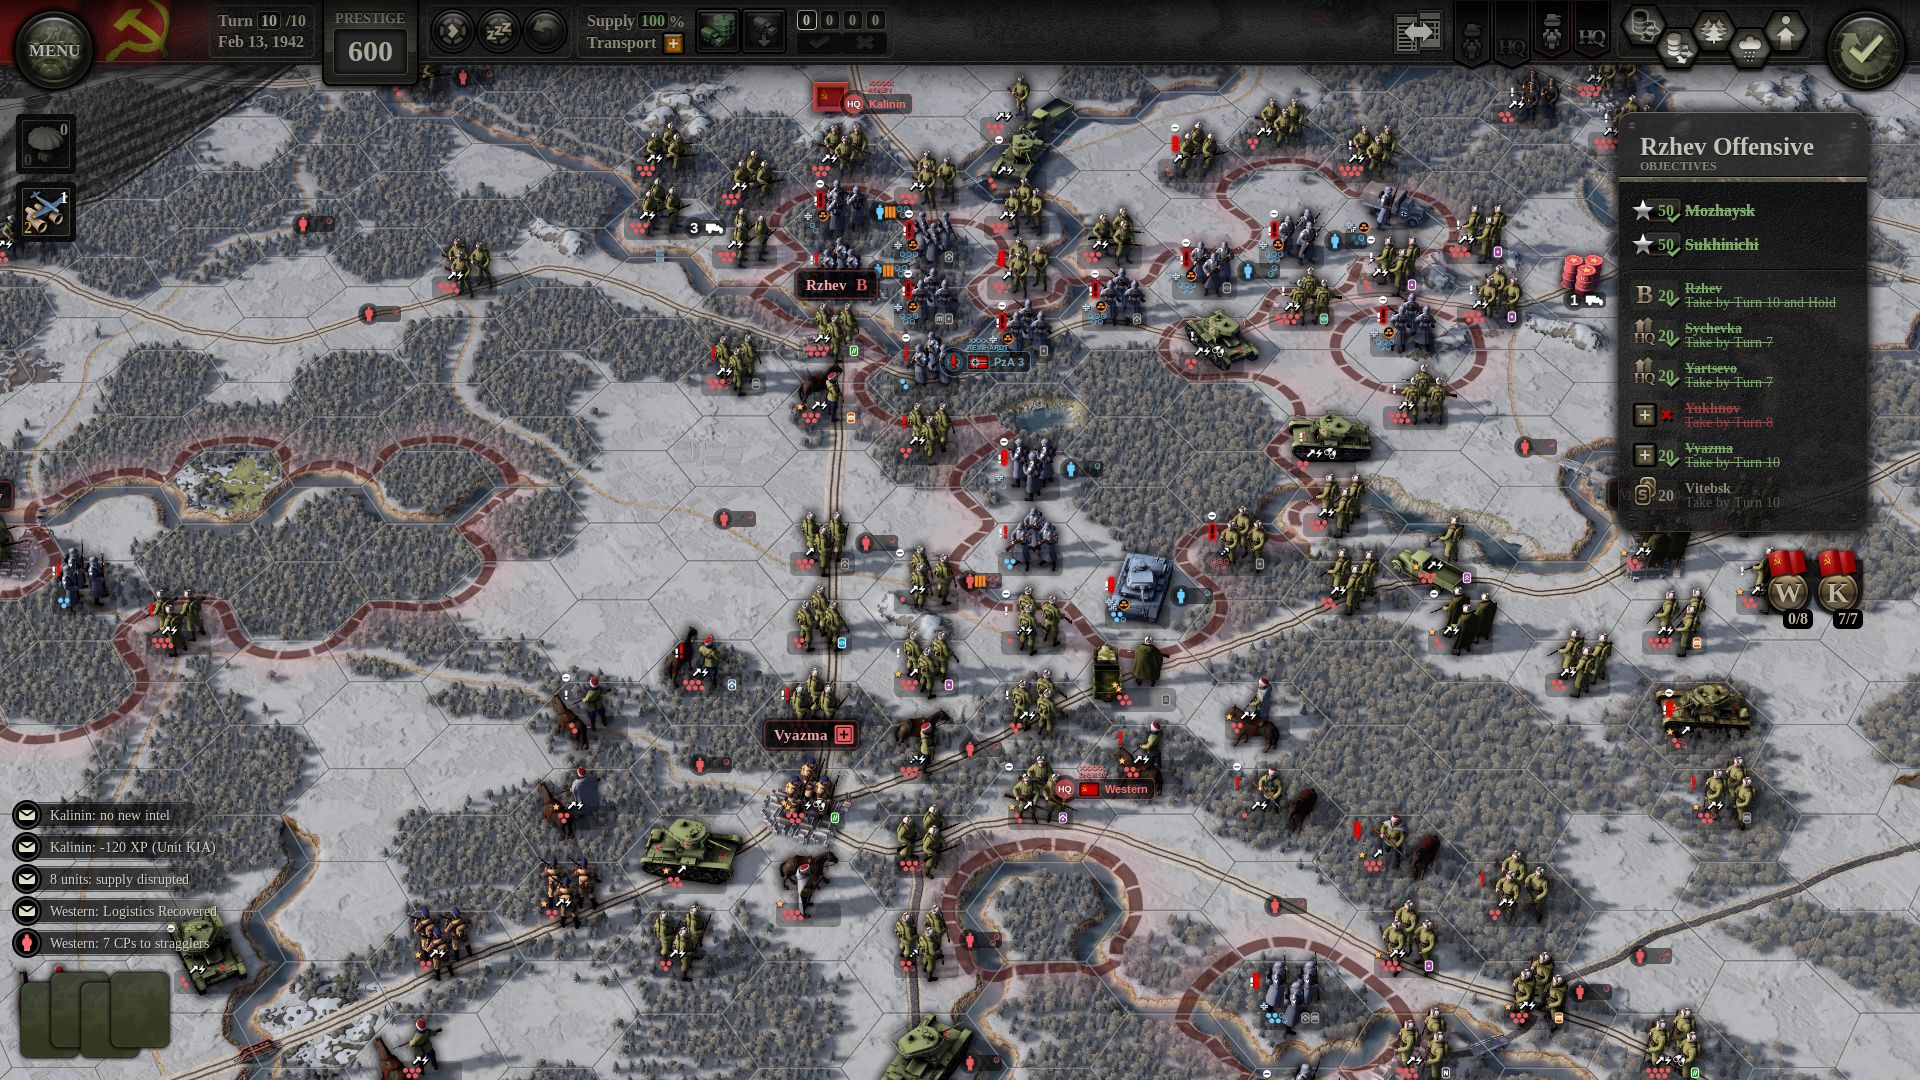
Don’t Go For All Bonus Objectives
We’ve decided to make this a periodic reminder?. If you miss a bonus objective here or there, it’s really not a big deal. Sometimes bonus objectives are designed to be concurrent to each other. You give more attention to one area, and this gets reflected in the other. It is your desire and effort to become a better strategist that really counts.
That would be all for this post, comrades. We hope your efforts at defending the motherland improve as a result of the techniques acquired on this website. In fact, anything else would gravely displease comrade Stalin. And we cannot have that. Ура!! ✊
4 Responses to I Was Killed Near Rzhev – A Developer’s Diary