Re: Black Turn "Prestigeless" BV Campaign
Posted: Mon Dec 30, 2013 8:08 pm
Taifun
The mother of all scenarios, as well it should be. You can really tell the Devs put their heart and soul into this one. I thoroughly enjoyed slugging through the mud and snow to acquire the feeling of absolute dominance over my enemy.
-The first thing I do is reassign the 20th panzer east of Roslavi, the division is too far away to help out on the 1st turn and the extra steps will add much needed firepower to newer/better panzer divisions
-Often times during this scenario I will also reassign a few of the lagging infantry units. I use the extra units to beef up my Pioneer units and Motorized Infantry units throughout the scenario
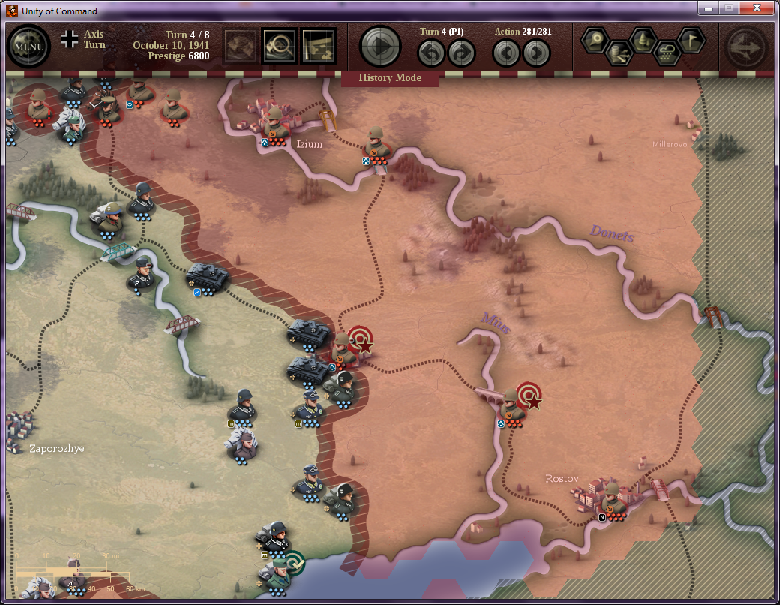
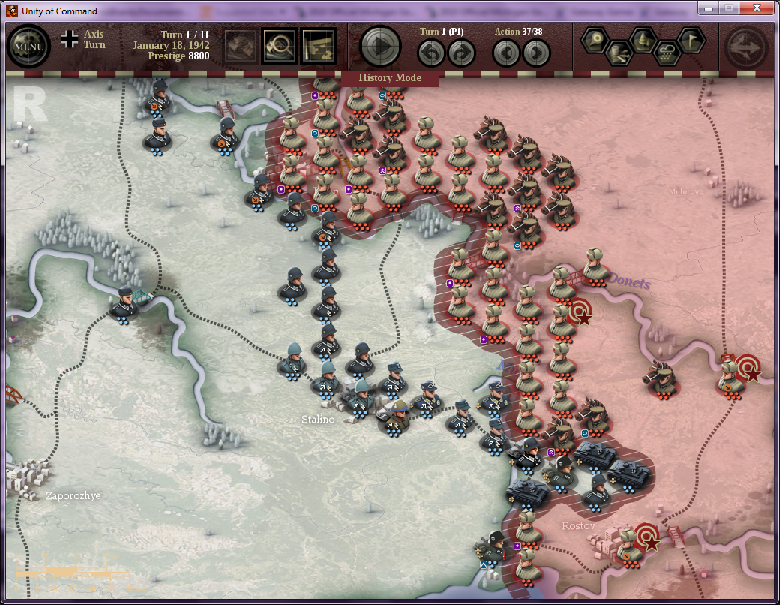
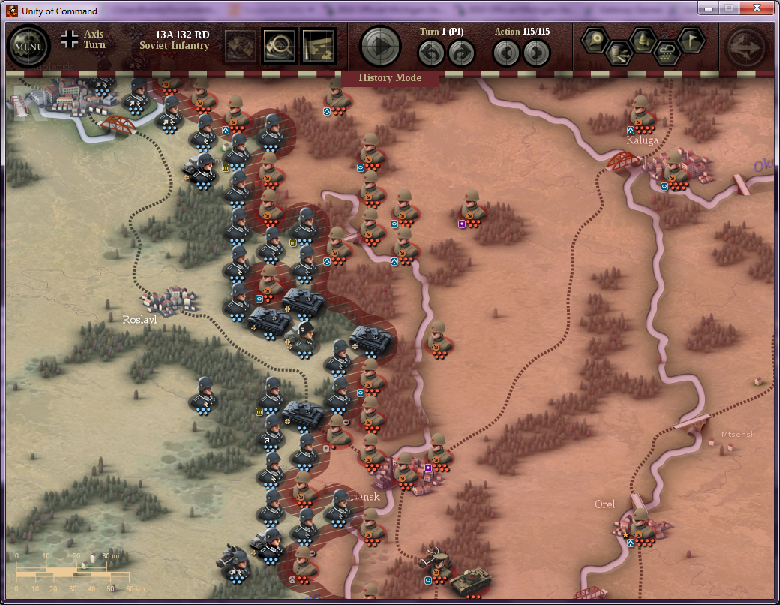
-In the south my plan was to push east towards Kursk and then move north to Tula and Moscow beyond, ignoring the forces north of the Sejm River I pushed past them and took the eastern bridge along the river
-Another good reason to ignore the forces north of the Sejm is the large amount of specialist steps attached to the infantry units there, I made sure to avoid ending a turn with one of my units adjacent to an enemy with a artillery attachment as they would be sure to attack me on their turn
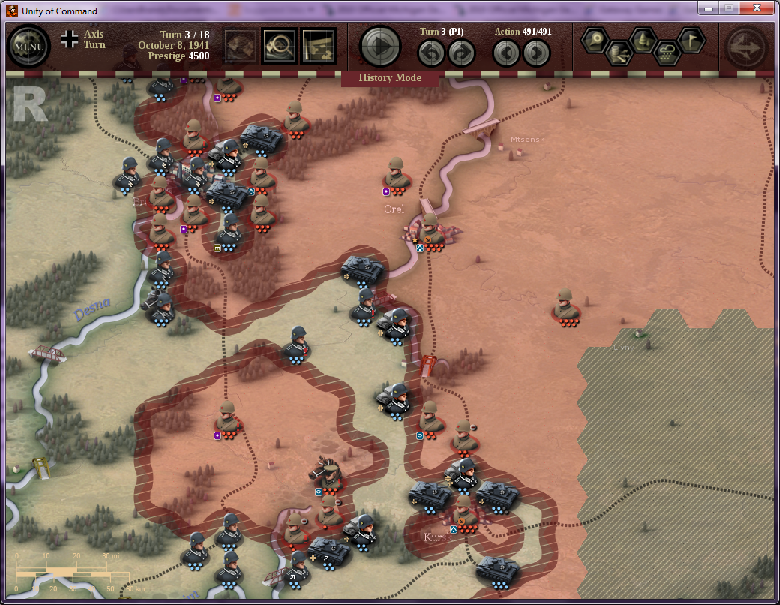
End of 1st turn in the South:
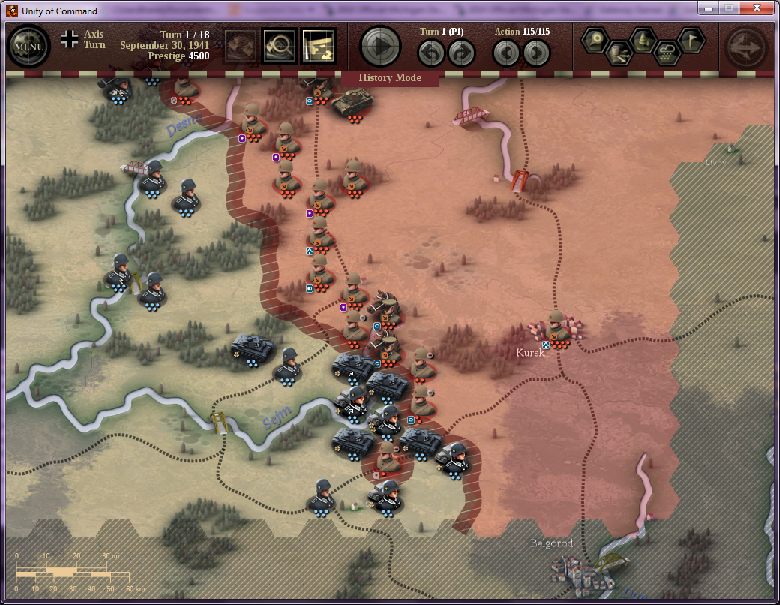
What to do with the center army could be a great debate among players. If you head north to support the attack on Vyazma it becomes a slugfest trying to move your armor through dug-in infantry in large forested areas. This causes a ton of crowding of your forces and also allows the enemy to send forces to harass your southern advance. Attacking towards Briansk and north along the Desna River causes the enemy to keep his forces in place. It also allows for a chance to cut the enemy supply line to Briansk and forces south of it. I chose the latter.
-I began to move the bulk of my center forces towards Briansk and towards the river, in the very north my Pioneer infantry and other units would attack towards Vyazma
End of 1st turn center:
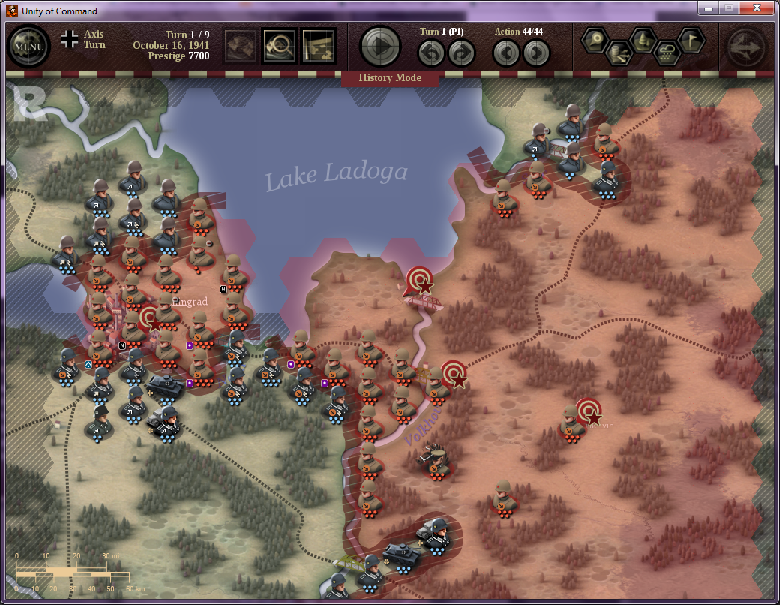
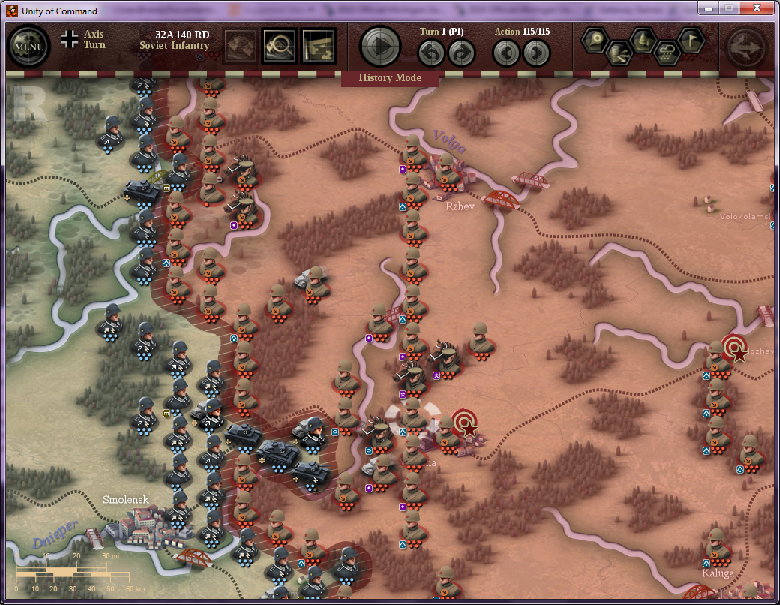
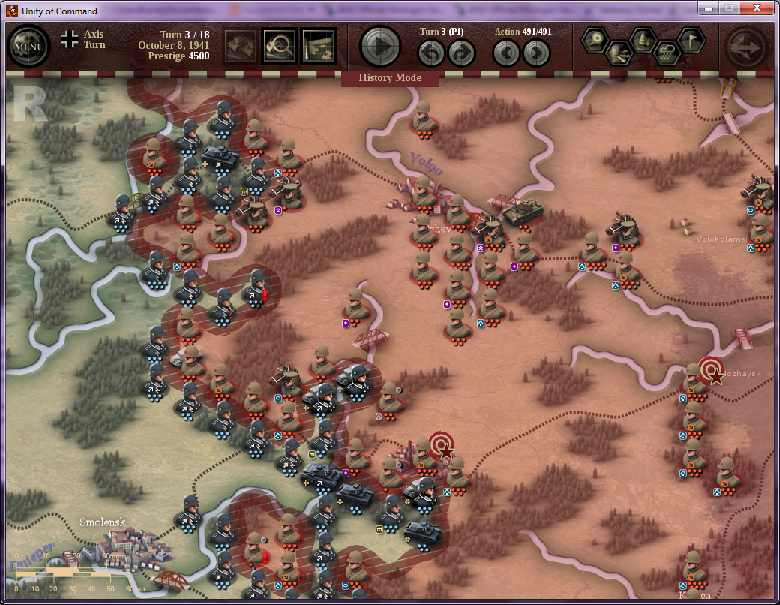
-In the north my choices were much fewer than other parts of the battlefield, I had to take Vyazma by turn 4 and subsequently Mozhaysk by turn 7, I opened up my attack in an attempt to take positions along the Dnieper so I could cross on the next turn, I was not as successful as I hoped to be but hoped to make up for it on the next few turns,
-In the extreme north my Pioneer unit crossed the Dvina to enable harassment attacks in the following turns
End of 1st turn in the North:
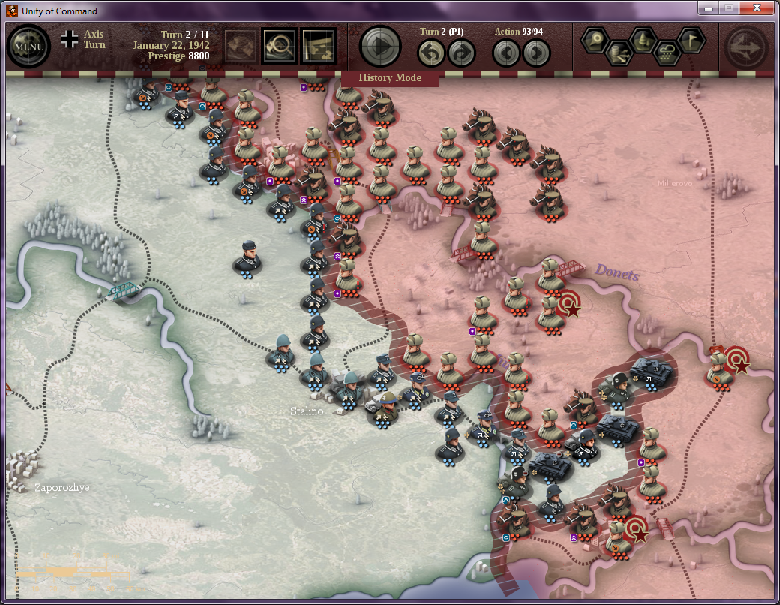
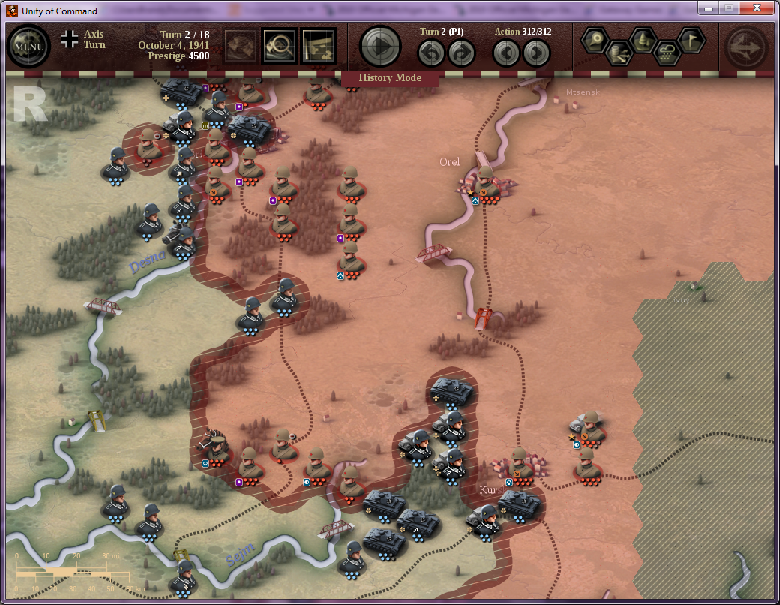
-Back in the south I made my way towards Kursk and prepared to encircle the city on turn 3, I placed my infantry units along and on the other side of the Sejm River to protect my supply lines
-In the center my forces crossed the Desna taking Briansk
End of 2nd turn in the South:
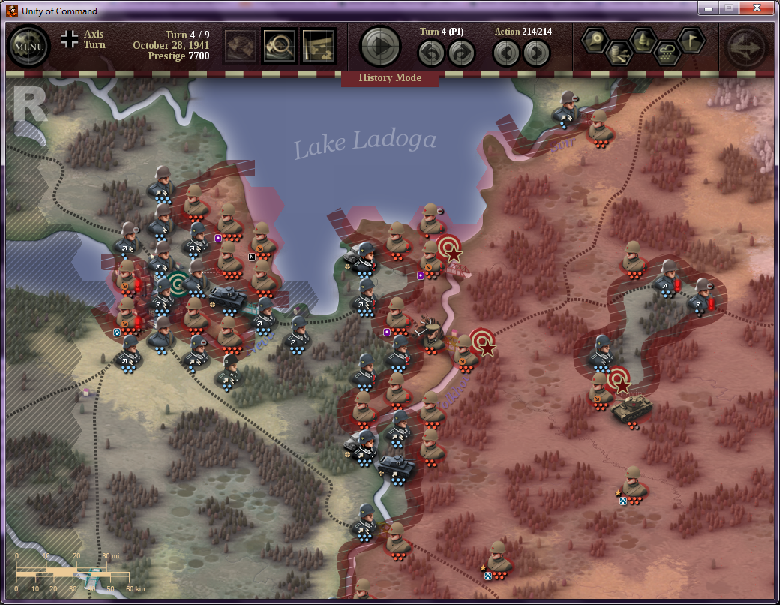
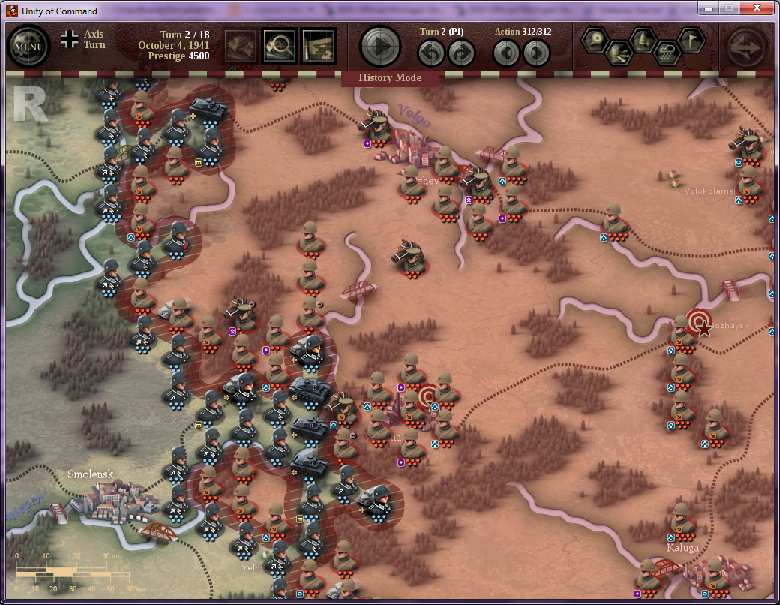
-In the north I was able to push through the forests southwest of Vyazma and take up positions along the river
End of 2nd turn in the North:
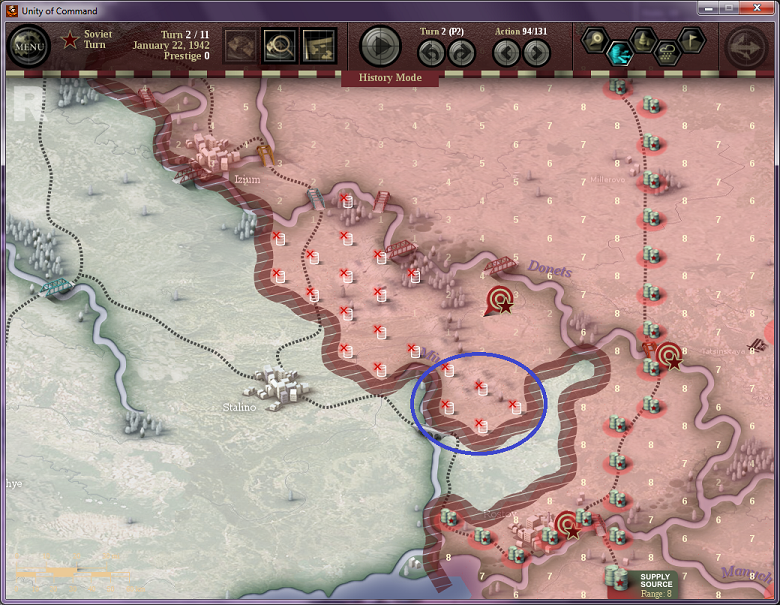
In the South my strategy for taking Kursk, Orel, and Tula along the route is to surround the city first, attempt to bomb the city with air attacks in hopes that a few steps will be killed or suppressed, and then follow up with strong armor attacks or wait until the city runs out of supply. Adding two steps to two of the panzer divisions in the south goes a long way in destroying these fortified enemy units as they can usually attack the city without having any casualties themselves. Just be aware they need to regain their veteran status prior to doing so.
-I encircled Kursk on turn 3 and cut off a few more of the southern enemy units
-In the center I slowly pushed out from Briansk keeping many units occupied
End of 3rd turn in the South:
-In the north I was able to take up positions adjacent to Vyazma with no doubt I would capture it on turn 4
End of 3rd turn in the North:
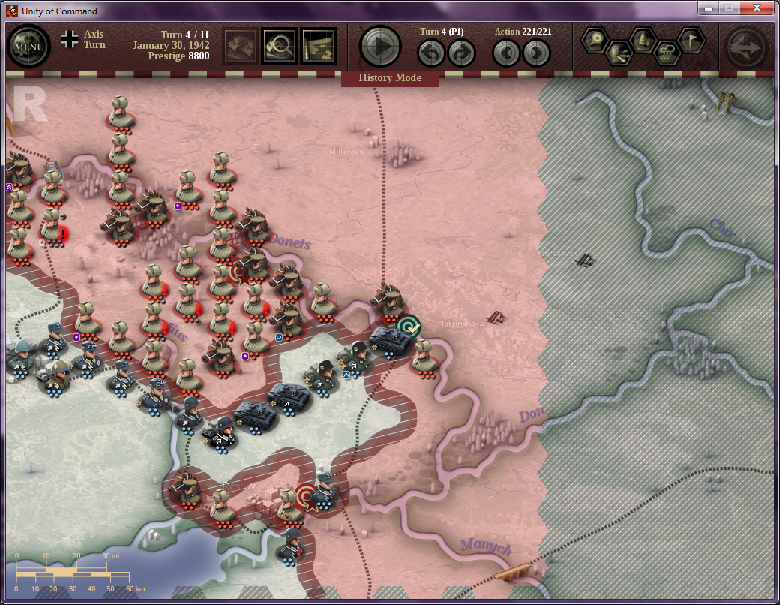
Turns: 4-6
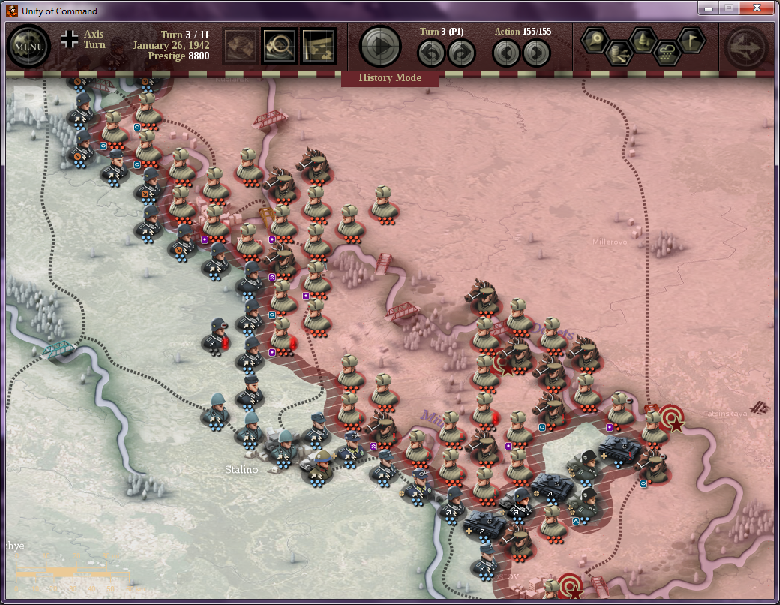
-During turn 4 I captured both Vyazma and Kursk
-Breaking through at Briansk allowed the center and southern forces to link up
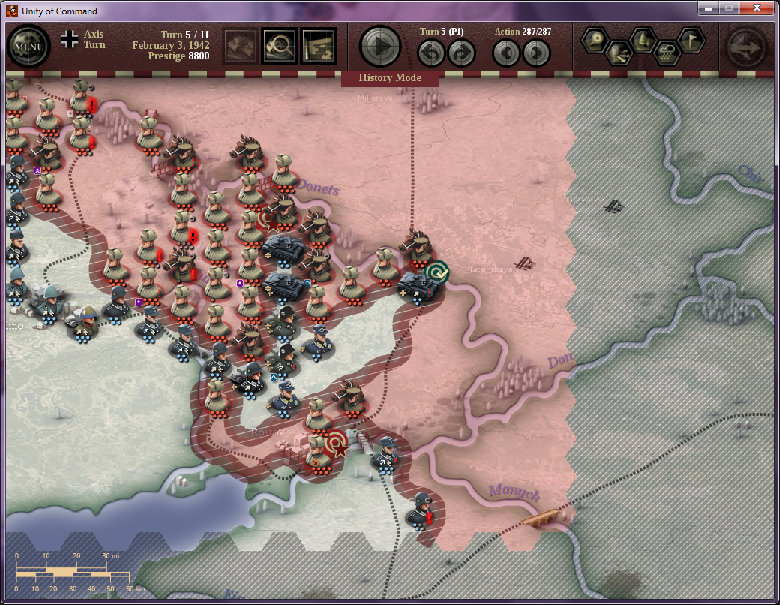
-On turn 5 in the southeast I surrounded Orel with my mobile army and was able to land a few good blows with my Air Force suppressing 5 steps, unfortunately the weather turned ugly on turn 6 and I would not be able to take Orel until the following turn
-In the north on turn 5 I moved to capture the zone of control next to Mozhaysk
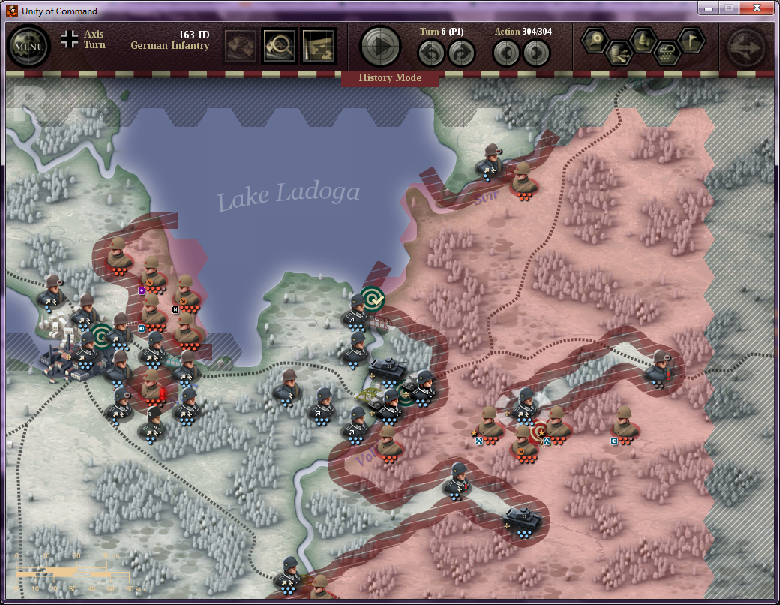
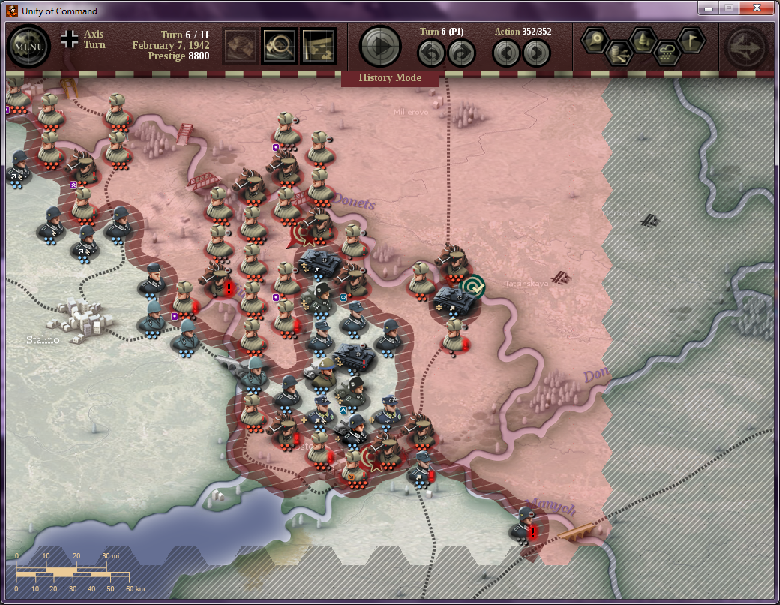
-Turn 6 in the north deserves special mention as it gave me a great opportunity to secure a position on the opposite side of the river north of Mozhaysk and at the same time cut the supply line to the enemy forces in the extreme northwest.
End of 6th turn in the North:
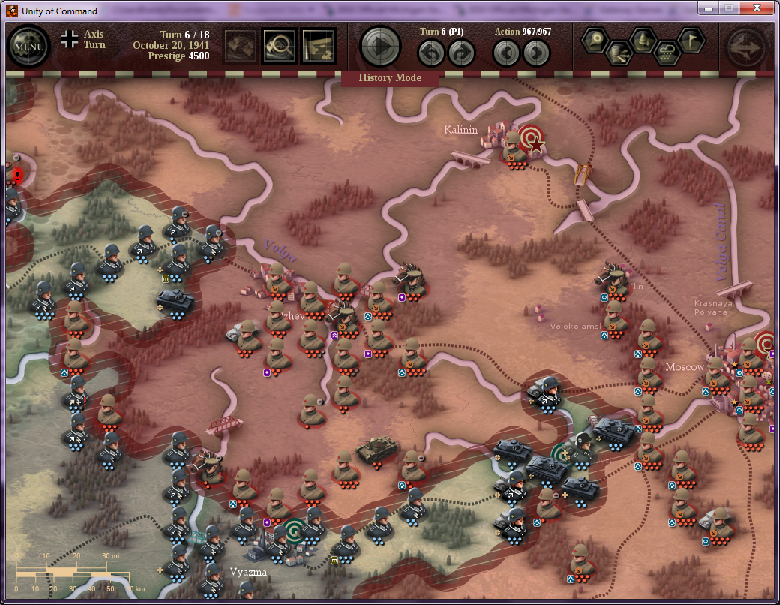
-On turn 7 in the southeast I captured Orel and destroyed blocking units sent from Tula
-In the north I secured my position on the opposite side of the river from Mozhaysk to make preparations to attack Kalinin
-Turn 8 I landed a few good blows on Tula with my 6 step armor units and consolidated my forces in the north
End of 8th turn:
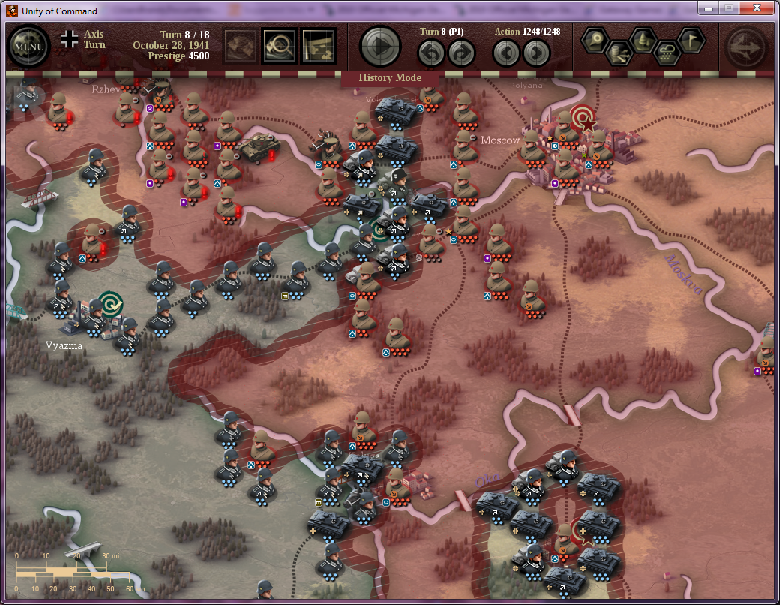
I have been burned at this same point in this scenario before. I sent just enough forces that I thought I needed to capture Kalinin by turn 11 and failed to do so. All of my hard work gone to waste I was not going to make the same mistake again. This play through I decided to send a ton of forces at Kalinin as you have ample amount of turns for them to return and assist in the attack on Moscow.
-On the 9th turn in the southeast I captured Tula a full three turns early and moved my forces north towards the final objective
-On turns 9 and 10 in the north I moved a very large force to capture Kalinin
End of 10th turn:
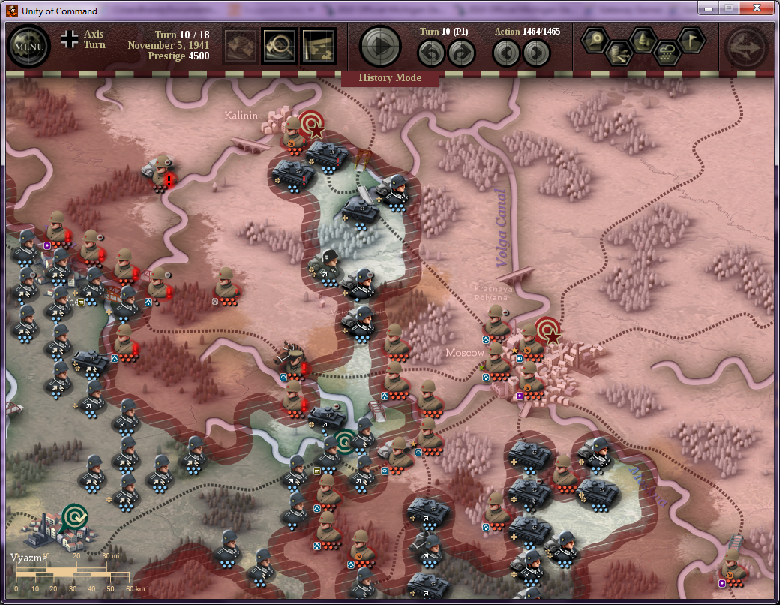
Although I understand why Moscow has a supply point within the city itself, I would have thoroughly enjoyed surrounding it and watching the enemy defenders starve to death. Ah well.
-During turns 11 and 12 I surrounded Moscow by bringing my forces back from Kalinin and crossing the rivers south of Moscow with my southeastern forces
-On turn 13 I attacked the Moscow defenders with my Pioneer unit successfully breaching them and then finishing them off with my panzers
Beginning of 13th turn:
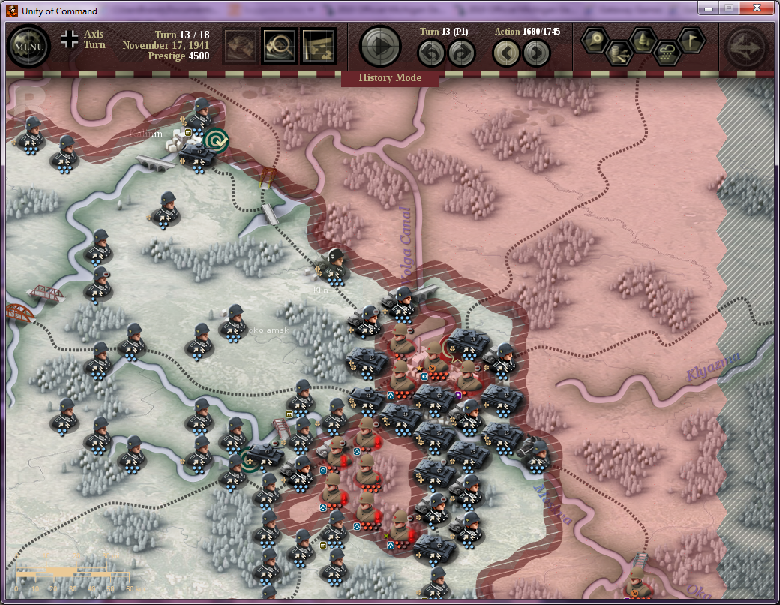
Great Success!
The mother of all scenarios, as well it should be. You can really tell the Devs put their heart and soul into this one. I thoroughly enjoyed slugging through the mud and snow to acquire the feeling of absolute dominance over my enemy.
-The first thing I do is reassign the 20th panzer east of Roslavi, the division is too far away to help out on the 1st turn and the extra steps will add much needed firepower to newer/better panzer divisions
-Often times during this scenario I will also reassign a few of the lagging infantry units. I use the extra units to beef up my Pioneer units and Motorized Infantry units throughout the scenario
-In the south my plan was to push east towards Kursk and then move north to Tula and Moscow beyond, ignoring the forces north of the Sejm River I pushed past them and took the eastern bridge along the river
-Another good reason to ignore the forces north of the Sejm is the large amount of specialist steps attached to the infantry units there, I made sure to avoid ending a turn with one of my units adjacent to an enemy with a artillery attachment as they would be sure to attack me on their turn
End of 1st turn in the South:
What to do with the center army could be a great debate among players. If you head north to support the attack on Vyazma it becomes a slugfest trying to move your armor through dug-in infantry in large forested areas. This causes a ton of crowding of your forces and also allows the enemy to send forces to harass your southern advance. Attacking towards Briansk and north along the Desna River causes the enemy to keep his forces in place. It also allows for a chance to cut the enemy supply line to Briansk and forces south of it. I chose the latter.
-I began to move the bulk of my center forces towards Briansk and towards the river, in the very north my Pioneer infantry and other units would attack towards Vyazma
End of 1st turn center:
-In the north my choices were much fewer than other parts of the battlefield, I had to take Vyazma by turn 4 and subsequently Mozhaysk by turn 7, I opened up my attack in an attempt to take positions along the Dnieper so I could cross on the next turn, I was not as successful as I hoped to be but hoped to make up for it on the next few turns,
-In the extreme north my Pioneer unit crossed the Dvina to enable harassment attacks in the following turns
End of 1st turn in the North:
-Back in the south I made my way towards Kursk and prepared to encircle the city on turn 3, I placed my infantry units along and on the other side of the Sejm River to protect my supply lines
-In the center my forces crossed the Desna taking Briansk
End of 2nd turn in the South:
-In the north I was able to push through the forests southwest of Vyazma and take up positions along the river
End of 2nd turn in the North:
In the South my strategy for taking Kursk, Orel, and Tula along the route is to surround the city first, attempt to bomb the city with air attacks in hopes that a few steps will be killed or suppressed, and then follow up with strong armor attacks or wait until the city runs out of supply. Adding two steps to two of the panzer divisions in the south goes a long way in destroying these fortified enemy units as they can usually attack the city without having any casualties themselves. Just be aware they need to regain their veteran status prior to doing so.
-I encircled Kursk on turn 3 and cut off a few more of the southern enemy units
-In the center I slowly pushed out from Briansk keeping many units occupied
End of 3rd turn in the South:
-In the north I was able to take up positions adjacent to Vyazma with no doubt I would capture it on turn 4
End of 3rd turn in the North:
Turns: 4-6
-During turn 4 I captured both Vyazma and Kursk
-Breaking through at Briansk allowed the center and southern forces to link up
-On turn 5 in the southeast I surrounded Orel with my mobile army and was able to land a few good blows with my Air Force suppressing 5 steps, unfortunately the weather turned ugly on turn 6 and I would not be able to take Orel until the following turn
-In the north on turn 5 I moved to capture the zone of control next to Mozhaysk
-Turn 6 in the north deserves special mention as it gave me a great opportunity to secure a position on the opposite side of the river north of Mozhaysk and at the same time cut the supply line to the enemy forces in the extreme northwest.
End of 6th turn in the North:
-On turn 7 in the southeast I captured Orel and destroyed blocking units sent from Tula
-In the north I secured my position on the opposite side of the river from Mozhaysk to make preparations to attack Kalinin
-Turn 8 I landed a few good blows on Tula with my 6 step armor units and consolidated my forces in the north
End of 8th turn:
I have been burned at this same point in this scenario before. I sent just enough forces that I thought I needed to capture Kalinin by turn 11 and failed to do so. All of my hard work gone to waste I was not going to make the same mistake again. This play through I decided to send a ton of forces at Kalinin as you have ample amount of turns for them to return and assist in the attack on Moscow.
-On the 9th turn in the southeast I captured Tula a full three turns early and moved my forces north towards the final objective
-On turns 9 and 10 in the north I moved a very large force to capture Kalinin
End of 10th turn:
Although I understand why Moscow has a supply point within the city itself, I would have thoroughly enjoyed surrounding it and watching the enemy defenders starve to death. Ah well.
-During turns 11 and 12 I surrounded Moscow by bringing my forces back from Kalinin and crossing the rivers south of Moscow with my southeastern forces
-On turn 13 I attacked the Moscow defenders with my Pioneer unit successfully breaching them and then finishing them off with my panzers
Beginning of 13th turn:
Great Success!